How To Fix A Bent Or Broken Headphone Jack
Now you have to listen to your music without a headphone. I would have suggested you buy a new one, but these new headphones are expensive and can be going for as high as USD 120. So, I think it is better to repair it because most issues with headphones are minor. If you have a broken headphone, it can be fixed with an adhesive or tape if you apply the tape or glue appropriately.
If the headphone is spoilt, you should first confirm charging it because most times the problem is with the charger so that the headset will be dead, and most people think the headset is spoilt; meanwhile, the charger is just spoilt, so I charge you always to check the charger first.
If after that your headphone is still spoilt, you should take it to a professional. But don't worry, there's a quick fix for your headsets to be back on your head where they should be in no time.
How to Fix a Short in Headsets
Splice the cords which are exposed. Combine the two (2) sides of each cable to ensure that threads of a similar color are linked. Retain each cord's two (2) ends parallel and turn them together.To retain the ropes in place while you work, use a third hand-fitted with alligator clips. Weld the cords. Use a joining iron over the spliced cords to melt a small dab of join and permit it to cool. To retain them apart from the ground cord, wrap the signal cord in an electric Sellotape. Sellotape them together as well if an individual has two (2) base cords. Tightly cover the shown area and Sellotape until all the threads are attached.
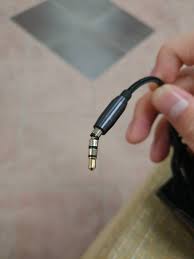
How to Fix a Spoilt Headset Charger
The best thing to do if you have a spoilt headset is to get a new one. But it is necessary first to test it on a different power outlet because you can't be so sure it is spoilt, but it is better to get it from a good store. Buy a replacement at an electronics store or online if your headset charger is spoilt. Choose a stereo-connected metal charger and a spring that's a similar size as your current charger.Slice the old charger off. Around an inch above where the cord and charger cross, cut through the cord. Some cords can be screwed off, but at the base of the rope, an individual might probably like the issue so that an individual can cut it regardless. To cut an inch of the cord's cover and reveal the threads, use scissors or cord strippers. To burn off the enamel coating, sort the threads by color and type, and then use a lighter.
Turn the color-like cords together.
Insert your new sleeve headset chargers over the cord so that the portion connected with the connector faces the exposed cord. On the end of each cord, melt a small dab of join and then permit the join to cool. To soften the join, add the join to one of the pins in the charger's housing and apply heat. Attach the cord to the charger by touching the joined end of the cord to the joined pin. For other cords, repeat the operation.
To make it easier to attach with the charger types, toughen the edges of the joined cord with sandpaper. By screwing the port sleeve into the socket, assemble your new headset charger. Make sure that the cords do not touch and that the sleeve is tightly secure.
What to Do When One Earbud Is Not Working
If one earphone does not fit because of a short cord, mend that portion of the cord; but the fix is most complicated if the earphone itself is the problem.Replacing a spoilt earphone is a job best left to the producer because of the varying designs of various headset brands. For help, check the manual or the maker's website. If there are screws to remove, an individual might need a size zero crosshead screwdriver. It is possible actually to tug any earbuds apart.
How To Fix A Spoilt Headset
By chiselling them with a knife to eliminate any obstructions, give your headsets a simple haircut.We found that our headsets had a piece of spoilt plastic sticking out that prevented the meeting of both pieces, and cutting this off ensured a tight fit between the two (2) parts. Pinch a small amount of adhesive off and roll it roughly the size of a pea into a neat ball. To the spoilt headset area, add the glue, shaping it into the shape of a cone. The time has come to get squishy! To compress the bond and bring it to stick, firmly force each end of the headsets together.
It should ooze over the sides with the glue. Flatten this surplus.
Adhesive and force it around the outside of the headset band over the crack, connecting both pieces. In a sausage shape, apply another layer of adhesive on top to add extra strength and firmness, and then squish down and flatten again. Now, leave your hacked headsets set for 12-24 hours in a resting place. The resting site must be one where your headsets meet the two (2) split components and can sit comfortably - permitting the adhesive to bind as it sets.
The role being photographed works well. You will note that we have put the cord here between the earphone and the headset band - this is only to detach the headset arm from the earphone and avoid bonding the adhesive to the earpiece!
Conclusion
You should check to confirm if your headphone is working first. If not, follow the steps above. And if they don't, you might need to get a new one.Get the best of Music Rooms
Expert guides, reviews, and tips delivered to your inbox. No spam, unsubscribe anytime.